Data Protectionand Privacy Policy

Showing posts with label Artista Paper Clay. Show all posts

Tuesday, 29 August 2017

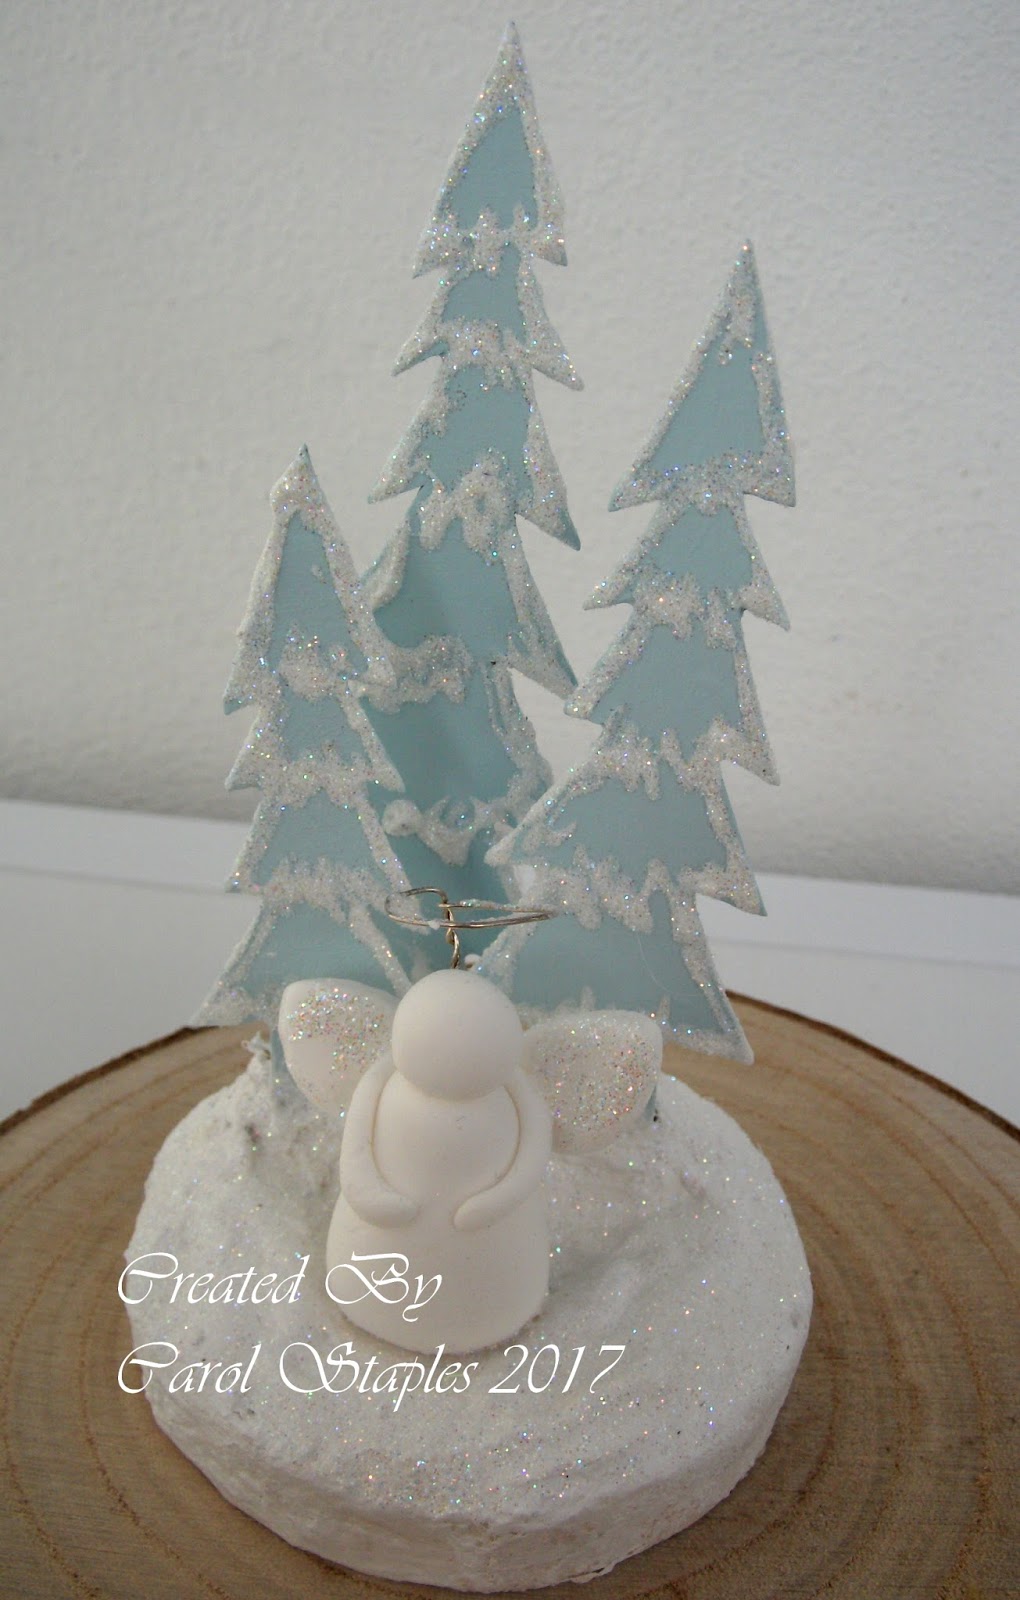
Homes For Angels

Hi, all my friendly followers and visitors.

I have at last made homes for my Angels!
The first picture is the one I have made to keep for us!!

All the Angels I have made from Hearty and Artista 
Paper Based, Air Dry Clay.

For the trees, I drew a large tree for a template and 
then made different height sizes. 


The large Angel is the one in my last post.
The small ones I made initially for smaller scenes.


As you can see they are a very simple design.


This is one of the first small scenes I made, before 
I even attempted to make the big Angel.

This is a slightly bigger one and thanks to my 
friend Lorraine's partner, Steve, who cut me the base
from their log stock. I have a few more too!!


Because she looked a bit lost on this piece
I found the little Bunny in my stash.
I covered it with Fluffy Stuff and Glitter.


My Craft Room looks very Christmasy at the moment.
Glitter everywhere!! 

Husband's Birthday today, so having a nice meal tonight.
Thanks for visiting and hope you will leave 
me a lovely message so I know you have been.

Big hugs
Carol 
xxxxx


Monday, 4 April 2016

Have a Heart and Thanks

I am doing a Craft Fair at The Cliff Hotel, in Gorleston, Suffolk tomorrow.

Really looking forward to it, as did very well last month on my first visit there!!
The weather is looking a lot better than we had last month.
Would love to see you if you live near enough to come.

This is a heart I made with weddings in mind.
It's a pretty big piece of MDF. Finished size about 12" x 8".


The paper I bought last year at Ally Pally. From which stall.... Who knows!!!

The Roses and Leaves I made with Artista Paper Clay. Just the same as 
making them with icing, petal by petal to whatever size you want.


Additional embellishments are from Anna Marie and Hobbycraft.

Health update. I am certainly loads better than I was. 
Result of the scan was a small stone lodged it my Kidney and they think that 
another large one has expelled itself.

They recommend that I have an Ultra-sound now, as they 
also saw Cysts on my liver!
Just waiting for an appointment.
So things are looking up and appears to be nothing really nasty. Phew!!

We had a nurse friend of mine come and stay with us from last Thursday
 until yesterday morning.
Was great to see her and we enjoyed showing some of the places 
we have found already. She loved it too.
The weather was amazing every day, so some visits to the beaches.
She had driven here from West Sussex, to also get her hair coloured and cut!!

A lovely lady and a great friend.
She's coming again in June!!

Thank you again for your support over the last weeks.
It helped me so much. You are all so lovely.
 Sending you all
BIG HUGS
Carolxxxx

Monday, 16 March 2015

Big Egg!! Not Easter!

Hi, everyone in blogland.
 
Firstly, I must warn you, there is a pics overload!
 
As in my title, this is a very big egg.
In fact, it is a real, empty Ostrich egg.
 
My Daughter and Granddaughter have just been around.
I showed them what I had done to it.
 
My Daughter said it was the most beautiful thing I had ever made.
I told her it was going on my stall to be sold.
She said that I was not to sell it and it would go perfectly in my bedroom.
So it is now sitting on my dresser in my bedroom.
 
I have had it for a couple of years and didn't know what to do with it.
My Brother-in-law made the stand for me and it has just sat on a shelf
in my craft room.
 
I then had a euricka moment on Wednesday and this was the result.
 
I had great fun doing it.
I first tore up loads of papers into smallish pieces.
Then I glued them all over the egg.
A covering of Gesso and assorted paints.
 
 
Using a glue gun, I stuck bits of lace very randomly and flowers, buttons
and also a few clay butterflies I had made.

 
I also cut some flourish die cuts and glued them on along with
wooden flowers and more butterflies, with sequins on.
At this stage it looked a mess!!

 
A bit of grunge paste and stamped text.

 
I love this Butterfly Flourish die from Wild Rose Studio,
 which I got from The Craft Barn.
They have loads of their stamps and dies, so check them out here

 
And then it suddenly looked ok!! 
 
Are you still awake?!!
This was a little out of the box for me but I loved doing it.
I am now onto another project,
that is all gessoed and waiting for my attention.
 
Watch this space. If it is c..p, I will let you know and hide it somewhere!
 
Thanks for popping in and I hope you liked my egg.
It's surprisingly heavy, even though it's empty.
 
Hugs,
Carolxx
 

Saturday, 7 March 2015

Beach Hut - Summer Is Coming!!

Hi to all my blogging friends.
What a gorgeous day here in West Sussex!!
I hope it's a lovely day where you are too.
 
I decided I wanted to make a Beach Hut clock.
So I sat down with a piece of paper and sketched what it should look like.
From that sketch, I made a template and then I made my Hut!!
 
I was quite pleased with the end result. Room for improvement though!
 
The little gold thing on the right side, is supposed to be a ship's bell.
It was a bell from my Dollhouse stash!
The 'Surfs Up' sign, is just a piece of wood I found in my bits box.
 
 
The shells I collected many years ago in Spain.
The life belt I made from Artista Clay.


This is a side view of the roof. I just scored it to look like planks. 
It was difficult to photo, so not very good.


This is my Sea Gull!! Ok I am not a sculptor!! I used my Artista Clay again.
I love this clay, as it's paper clay, it weighs nothing and is air drying.
I just rolled into a sausage, bent it into a sort of shape and formed the beak.
Used a knife to mark the feathers. Job done!
Took me a whole 7 minutes!!
Go on then, say it..... It looks like it too!!!!!
It dried overnight and then I used Copic pens to add a bit of colour.


When you open the doors, this is the inside.
Scraps of fabric for the bunting.
Another piece of wood for the surf board. Fish net and floats on the back wall.
Stamped and cut out Deck Chairs and more shells dotted around.
 
 
I hope my clock at least made you smile. As I said, room for improvement.
My style is Shabby Chic!!
Thanks for stopping by and please leave me a message, so I know you have been.
I then can hop over to you and see your lovely work. Then leave you a message too.
Have a lovely weekend.
 
Hugs,
Carol xxx


Wednesday, 4 March 2015

Girly Girls - Crafting For All Seasons Challenge #97

Hi everyone,
Here we are again, with a new challenge, with Crafting For all Seasons.
I hope you joined in with our last challenge, Dies and/or Punches.
Well done to the winner.
 
It could be you this time, if you would like to play along.
 
An easy theme for you......Girly Girl.
A great prize again and the challenge is for 2 weeks.
So you have plenty of time to enter.
 
I have chosen to use my own image for this challenge.
She is a, My Besties Digi, called Teen With Curly Hair.
 
She is so pretty and fits the theme perfectly.
I coloured her with Distress inks.
 
The papers were an assortment of, stash, CD and LOTV Nit Wit papers.
The sentiment die is from Memory Box.
 
 
The handbag is from Art Cuts, covered with a scrap of paper.
I added Stickles to her ribbon and her dress.
 
 
Our Sponsor for this challenge is Scrapper's Delights.
The are very generously giving the lucky winner,
3 Digi images of your choice.
 
 
Pop over here, to visit their well stocked shop.
 
Our brilliant, talented design team, have made some beautiful girly cards,
to inspire and amaze you.
 
So then you can get into your crafting zone and
add your design to the challenge. Good luck!
 
Before I go, I must update you on a couple of things.
Firstly, I have received my money back, for the EBosser that I returned to
Create and Craft. Reading comments on sites, many people have
had the same problem.
Similar problems with the updated version too, it seems.
 
This is the clock my Granddaughter made. It was for her
homework at half term.
She had to make something with a Victorian theme.
She chose all the elements and I helped with the board cutting and
putting in the clock mechanism.
She did all the painting and sticking together!
 
She was awarded the Head Teachers award, which she received in Assembly.
The Head Teacher also advised the full Assembly,
that they should make time to go and view the clock!!
She had a lot of visitors!!
 
 
Thanks for stopping by and I hope you like what you have seen.
I am looking forward to seeing your entries into our challenge
and reading your lovely comments, that you take the time to leave me.
 
Hugs,
Carol xx
 

Sunday, 15 February 2015

A New Timepiece

Hi all, hope you are having a lovely weekend.
 
I have been sorting out a couple of drawers in my craft room.
Probably will regret it, as I won't remember where I have moved stuff to!
Most drawers are sort of labelled!
 
Tomorrow, I have my Granddaughter for the day and
Tuesday I have my Grandson.
Half term holidays. So looking forward to a couple of fun days.
 
My Granddaughter has to make a Victorian item for school, as homework.
So we are going to make a clock like this one but with Victorian decoration.
 
For this one, I used a great template from House on Zandra.
It is very easy to put together.
It was for a decorative use only but I wanted to make a working one.
I had to alter parts of the middle section, to cover the clock movement.
Only because I didn't want to see them!
 
On the one we are making tomorrow,
I will make the cover a bit better than this one.
As I will completely change the middle section.
 
The Decorations on the outside are made with paper clay.
 

The window in the clock front has acetate in,
so you can see the decoration inside.


I used a Marianne Die for the fence and a Wild Rose Die for the
Butterfly flourishes.
The paper at the back was free from an old magazine.
The daisy flowers are from Artista paper clay, which I Bought at The Craft Barn.
The Bunny and wooden flowers are from Art Cuts.

 
I really enjoyed making this clock and looking forward to
doing another tomorrow.
Now I have worked out how to modify the template!
 
Just to update you on my EBosser. I spoke to a lovely lady at Create and Craft Customer Service.
She has arranged for it to be collected from me on Wednesday.
As the plates are sticking out the front, I had to find a suitable box to put it in.
My hubby went to a pet shop nearby, Pets At Home. 
They were very helpful and unpacked
 a Gerbil Hotel Cage and gave him the box!! A perfect fit!!
 
I am now going to do the dreaded ironing!! Not my favourite job!
 
Thanks for stopping by. I love visiting your blogs and
I always leave a message.
 
So reading your lovely comments, gives me a lift too.
It's always nice to see who has been.
It's just a shame that all visitors don't take the time to just even say Hi!
We always will return the compliment.
It's a great way to meet new crafting friends too.
 
Hugs,
Carol xx